Search results
Query: arduino uno
Links: 18 | Categories: 0
-
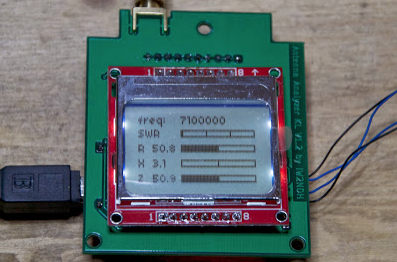 The project details a DIY SWR/Wattmeter designed around an _Arduino Uno_ shield, providing capabilities to measure RF power from 2 to **200 watts** and Standing Wave Ratio (SWR) for HF amateur radio bands. This construction features a compact design, integrating the measurement circuitry directly onto a custom PCB that interfaces with the Arduino Uno microcontroller. Key components include a directional coupler for sensing forward and reflected power, precision rectifiers, and analog-to-digital conversion for processing RF signals. The Arduino firmware handles calibration, calculations, and displays the results on an integrated LCD, offering real-time feedback on antenna system performance. The design prioritizes simplicity for homebrewers. Performance specifications indicate accurate readings within the **2-200W** power range, suitable for typical QRP to medium-power HF operations. The project provides schematics and a basic overview of the software logic.
 -
-
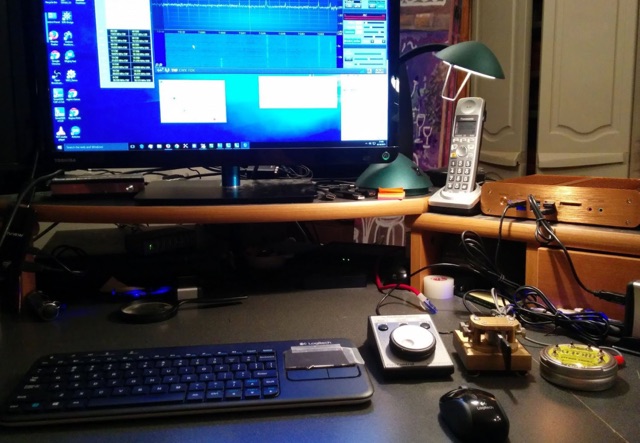
 A homemade remote antenna switch made with an Arduino Uno by KK7S
 -
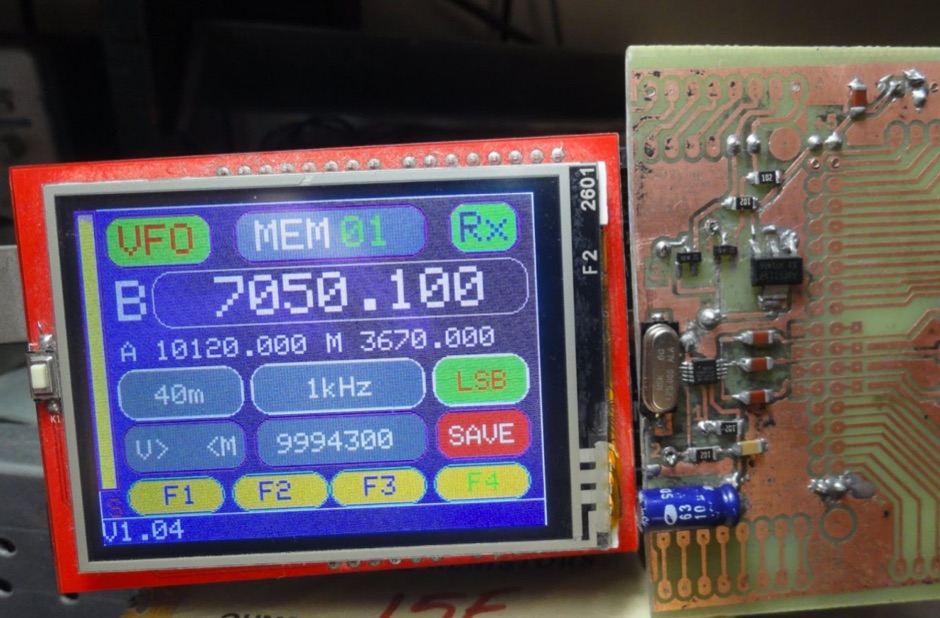 Arduino uno universal VFO/BFO with Si5351 and TFT touch screen for BITX like txcvr
 -
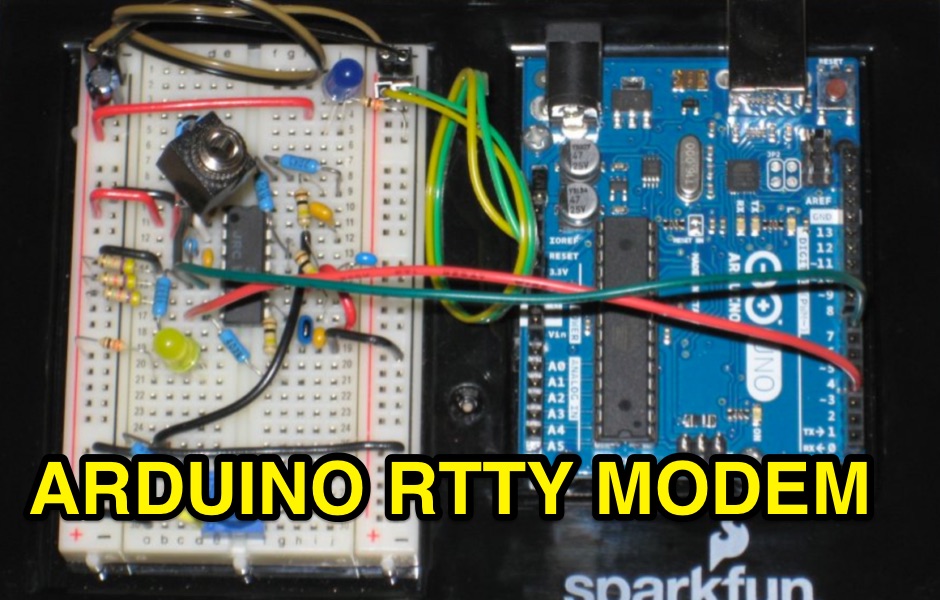 A project for a simple RTTY decoder based on Arduino UNO R3. Includes the RTTY modem source code available for download along to schematics pictures and references.
 -
 A controller for the miniVNA using an Arduino UNO and touch screen color graphic LCD display
 -
 If you want to build a cw decoder without using other active components than an atmel 328 - Arduino UNO , then this is sure something for you.
 -
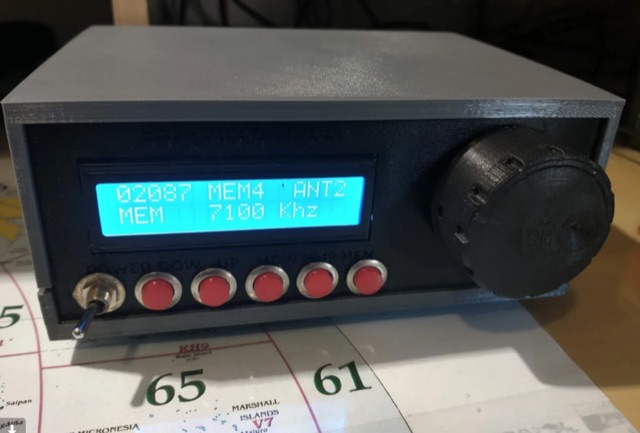
 An Arduino uno based project to control an MFJ 998 antenna tuner via Icom CI-V interface by VE1ZAC
 -
 Easy to build CW decoder based on DSP Goertzel code. If you want to build a cw decoder without using other active components than an atmel 328, Arduino UNO, then this is sure something for you.
 -
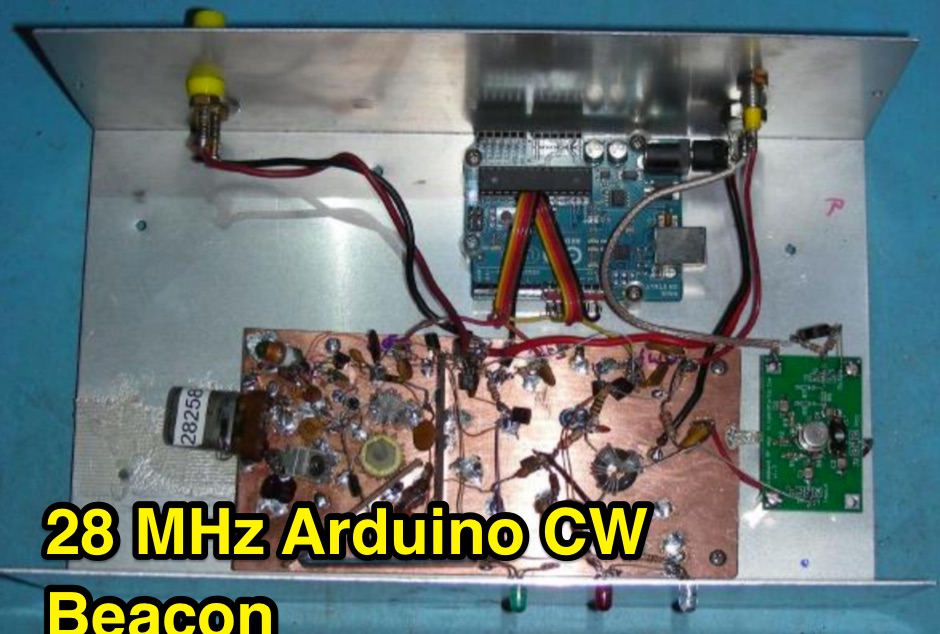 This project involves the construction of a 5 Watt Morse code beacon transmitter that operates in the 28.200 to 28.300 section of the 10 Meter Amateur Radio band. The beacon controller uses an Arduino Uno microprocessor board to produce the three signals that control the transmitter.
 -
 A simple DIY project to have a remote cw key connected to your Rig. On the remote side it uses and Arduino Uno board and a cheap HanRun Enc28J60 ethernet shield. On the local side it uses a Morse Key connected to a serial port.
 -
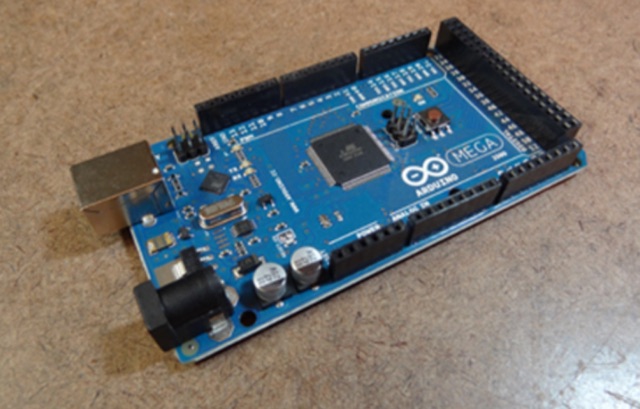 his controller uses the Yaesu GS-232 command set to control a Yaesu G-5500 Az-El rotor. The controller was designed to be compatible with the SatPC32 tracking program and should work with any tracking program that supports the Yaesu GS-232 format. This controller has been tested with the Arduino UNO and the Arduino Mega2560.
 -
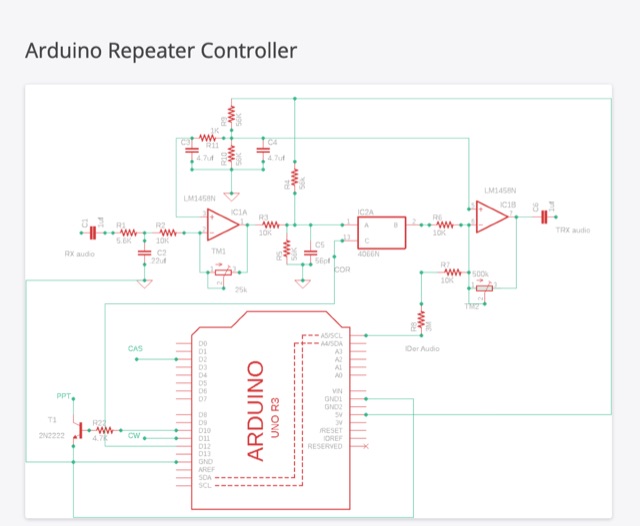 This blog article introduces an updated repeater controller project utilizing the Arduino UNO. It includes a CW identifier, and the ID message can be customized using hex codes. The author offers a Windows command line program for easier message coding and provides a link for download. The controller features three adjustable timers for IDer, Timer-out, and Squelch-tail. The article also mentions the use of an audio switch to control audio levels between the receiver and transmitter. Detailed instructions and code files are available on the author's website for both version 1 and version 2 of the Arduino repeater controller. The project aims to enhance repeater functionality and audio management in ham radio operations.
 -
 This project is for those ham amateurs who do not have a commercial one . It's easy to build with a soldering iron, a plastic case and a little knowledge of arduino. The controller is made with budget components you can find easily in Internet. The main component is a cnc shield that fits over an Arduino Uno. Both made a compact, small and cheap controller.
 -
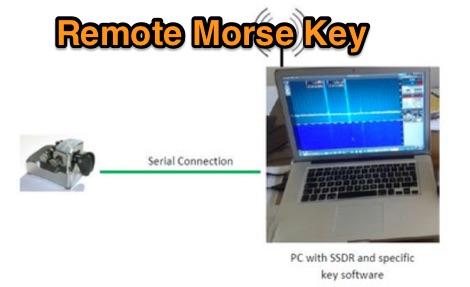
 A simple DIY project for a remote cw key connected to your Flex Rig (actually it can be any other rig). On the remote side it uses and Arduino Uno board and a cheap HanRun Enc28J60 ethernet shield. On the local side it uses a key (better a keyer) connected to a serial port of your pc
 -
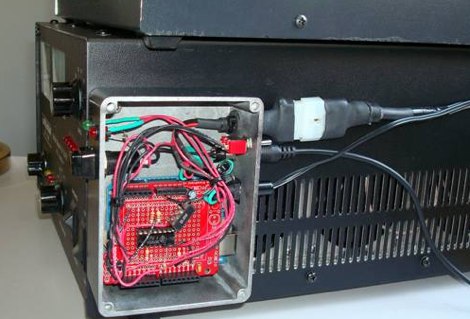
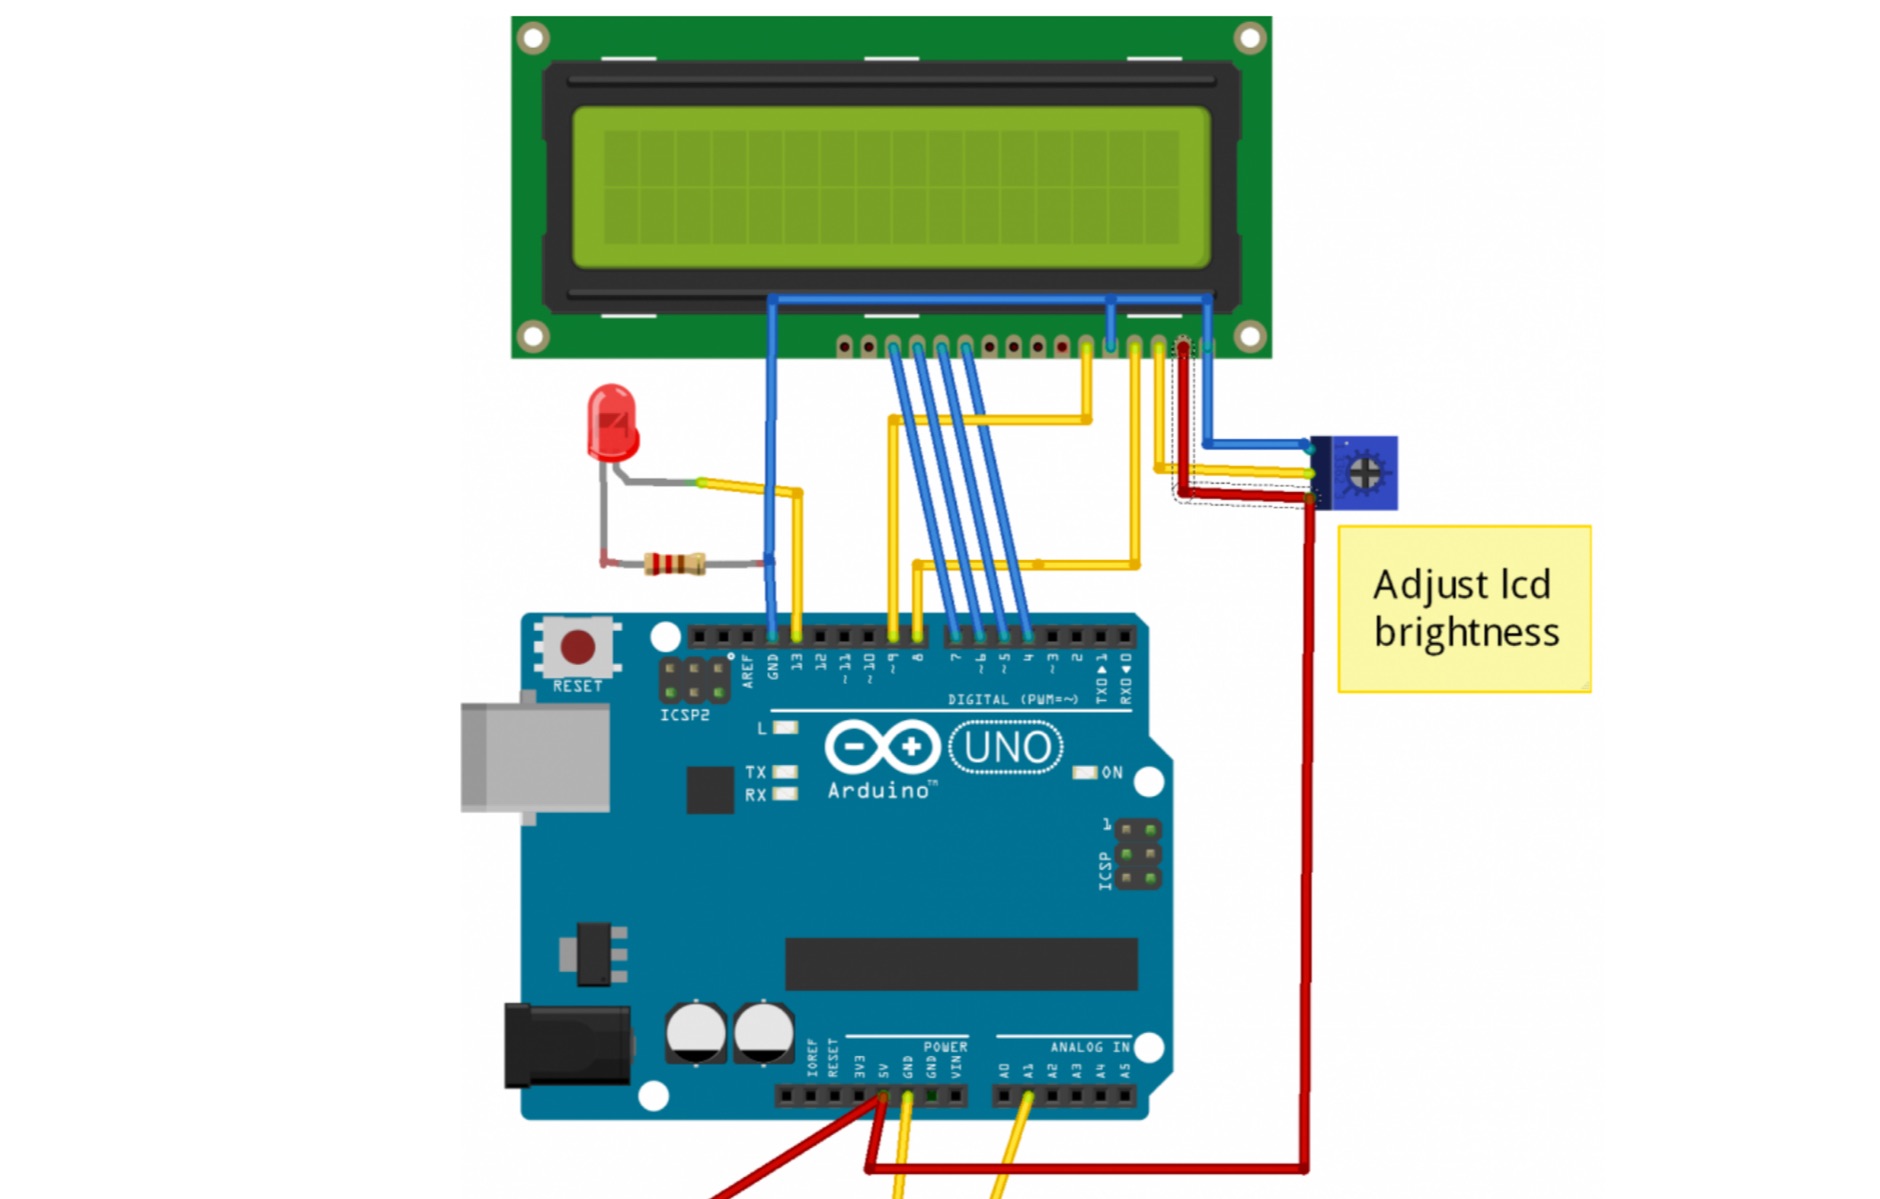
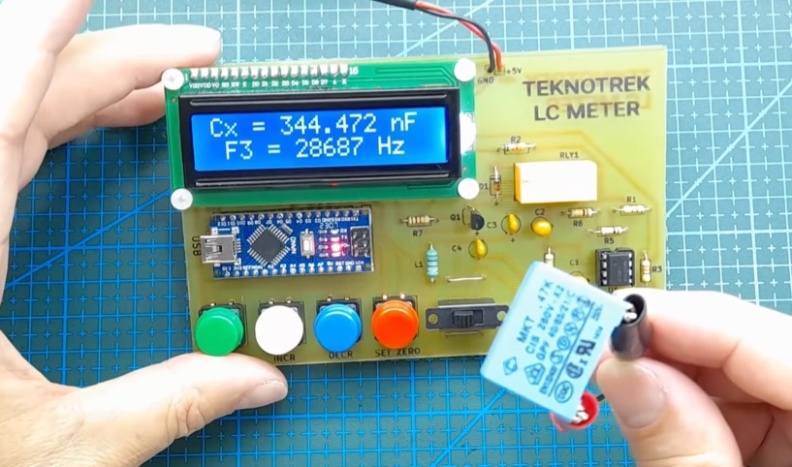 An **Arduino LC Meter** provides an accessible solution for precisely measuring inductance and capacitance values, crucial for RF circuit design, filter tuning, and troubleshooting in amateur radio applications. This project details the construction of a low-cost, accurate instrument using readily available components, making it an attractive alternative to commercial units for hams and electronics enthusiasts. The build process involves assembling a resonant circuit, integrating an Arduino microcontroller for frequency measurement, and displaying results on an LCD. Key components include an Arduino Uno, a 16x2 LCD, a 74HC14 Schmitt trigger inverter, and a few passive components. The design leverages the Arduino's processing power to calculate L and C values from resonant frequency shifts. Calibration procedures are outlined to ensure measurement accuracy, which is vital for critical RF work. The project includes schematics, a parts list, and the necessary Arduino code, enabling hams to construct a functional LC meter for their workbench.
 -
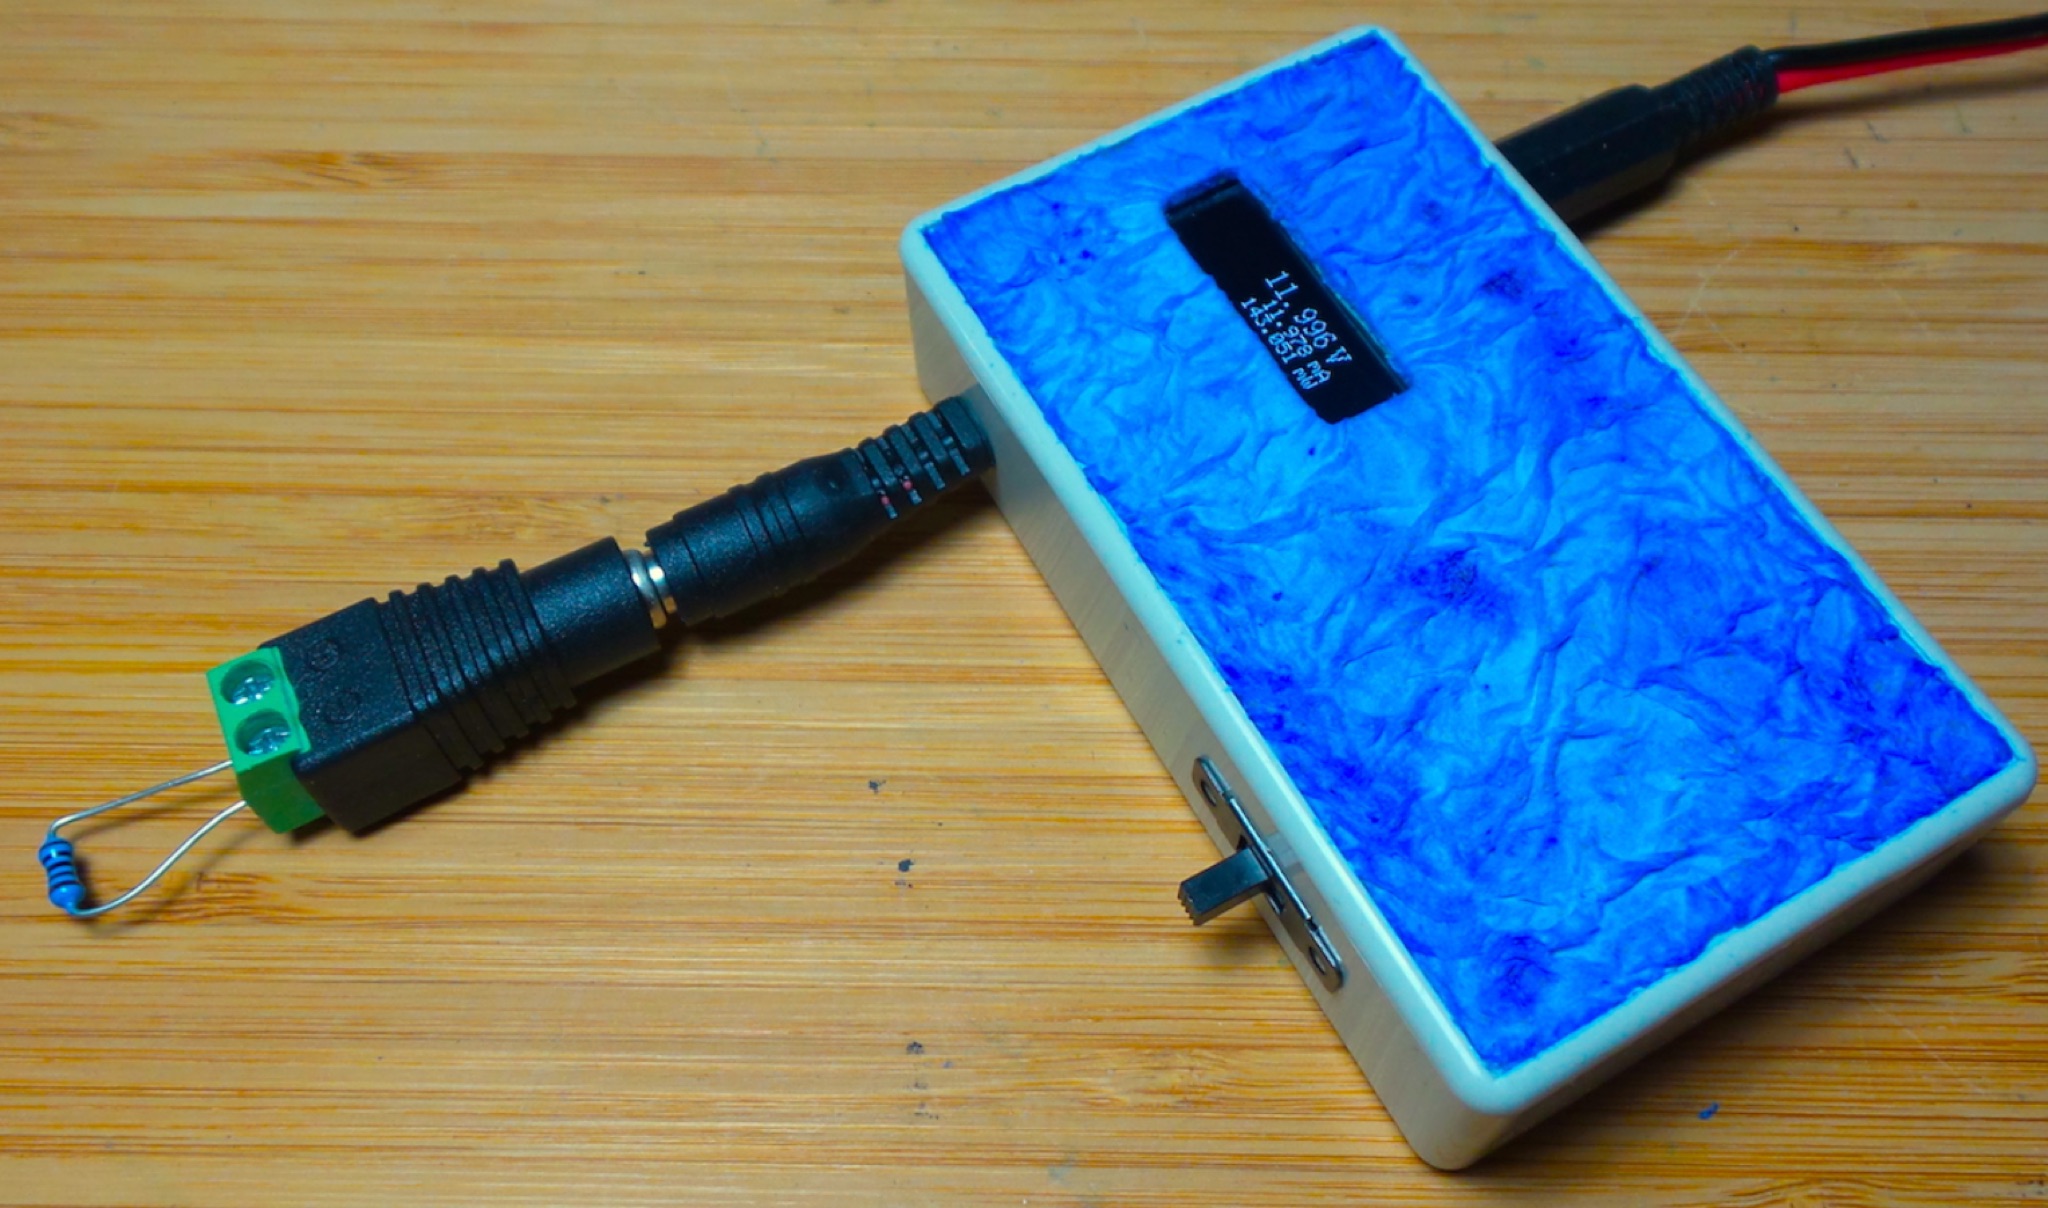 The DIY Power Meter project utilizes the _INA226_ high-side power monitoring chip, paired with an ATtiny85 microcontroller, to measure voltage, current, and power, displaying the results on a 128x32 OLED screen. The INA226 communicates via an I2C interface and is programmed with a calibration factor based on the shunt resistance and current register LSB. The project is designed to handle a maximum current of 500mA using a 0.16ohm shunt resistor, which can be adjusted to a 0.2ohm resistor, reducing the full-scale current range to 409mA with a resolution of **12.5uA**. The shunt resistor dissipates only 33mW at maximum current, making 1/4 watt resistors suitable for the setup. The PowerMeter.ino sketch configures the shunt resistance and maximum design current, automatically calculating the calibration factor. The project can be prototyped on a breadboard using an Arduino Uno, employing the Wire library for INA226 and OLED communication, and the u8g2lib library for the OLED display. For the ATtiny85 version, the Adafruit-TinyWireM and Tiny4kOLED libraries are used. The power meter is independently powered by a 3V CR2032 cell, with power switching options including manual switches or DC switched jacks. The low-side n-channel MOSFET switch configuration is tested but introduces voltage drop issues, making manual switching a more reliable option until a suitable DC switched jack is found. DXZone Technical Profile: INA226 | ATtiny85 | OLED Display | Power Meter
 -
 This page presents a project involving attaching an amateur radio transceiver to an Arduino to create a 'fox' signal for radio direction finding practice. This project can be used to practice direction finding skills by locating a radio transmitter in a hidden location. The project involves transmitting the station ID using Morse code and can be a fun and educational activity for students or hobbyists interested in radio direction finding. The author shares their experience with radio direction finding and provides instructions on how to build the project using a Baofeng UV-3R radio and an Arduino Uno.