Search results
Query: Arduino
Links: 143 | Categories: 4
-
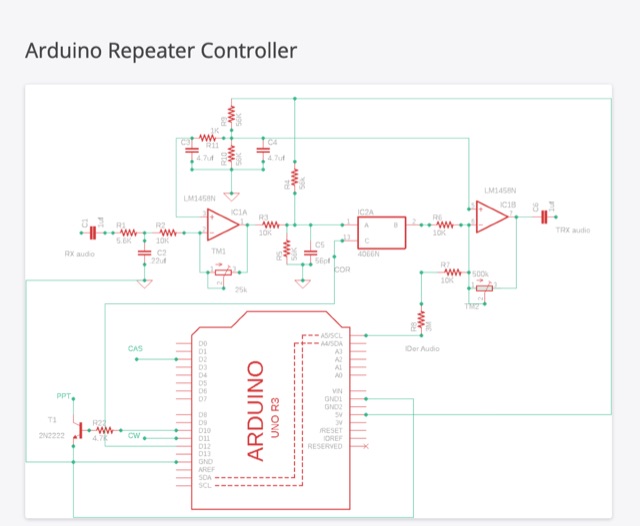 This blog article introduces an updated repeater controller project utilizing the Arduino UNO. It includes a CW identifier, and the ID message can be customized using hex codes. The author offers a Windows command line program for easier message coding and provides a link for download. The controller features three adjustable timers for IDer, Timer-out, and Squelch-tail. The article also mentions the use of an audio switch to control audio levels between the receiver and transmitter. Detailed instructions and code files are available on the author's website for both version 1 and version 2 of the Arduino repeater controller. The project aims to enhance repeater functionality and audio management in ham radio operations.
 -
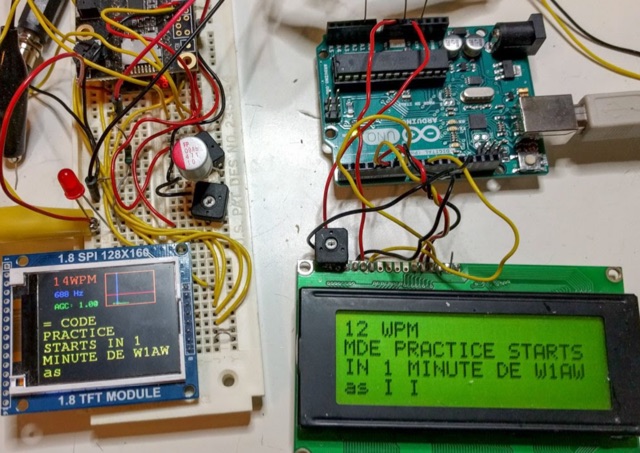 Two easy to build microcontroller projects for machine recognition of hand-sent morse code
 -
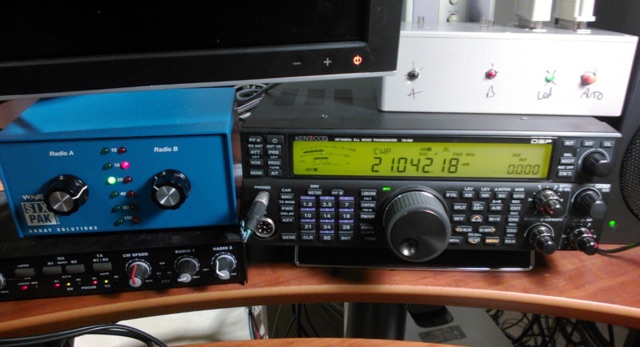 In pursuit of enhanced station efficiency, the author describes crafting an Arduino-based smart antenna switcher for an SO2R setup. Faced with manual antenna switching challenges during contests, the project utilizes a Logos Electromechanical 4x4 Driver Shield and a Power Screw shield for seamless functionality. Despite its raw appearance, the automatic switcher proves indispensable in contest scenarios, prompting considerations for future improvements and standardization of station control protocols.
 -
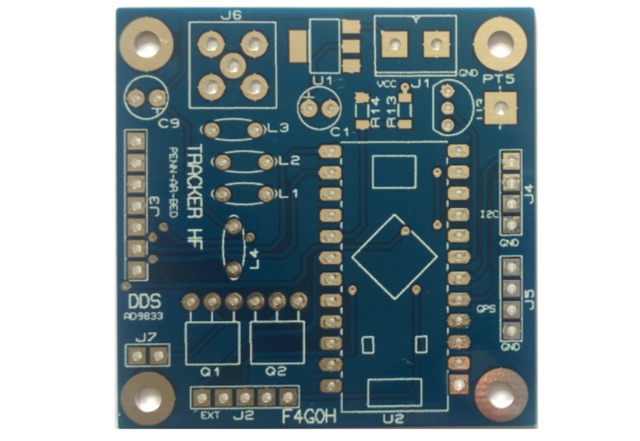 The PCB can produce a High Frequency RF signal in the range of 1MHz to 12.5MHz using an AD9833 Direct Digital Sequence (DDS) frequency synthesizer. The signal can be modulated with different Weak Signal modes such as WSPR, JT9 and JT65 using our Arduino 5V/16MHz Pro Micro software.
 -
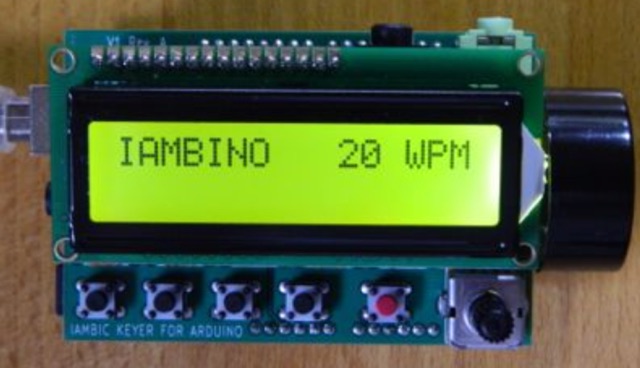 Iambino is a Iambic Keyer for Arduino running hardware containing an ATmega328 or ATmega32u
 -
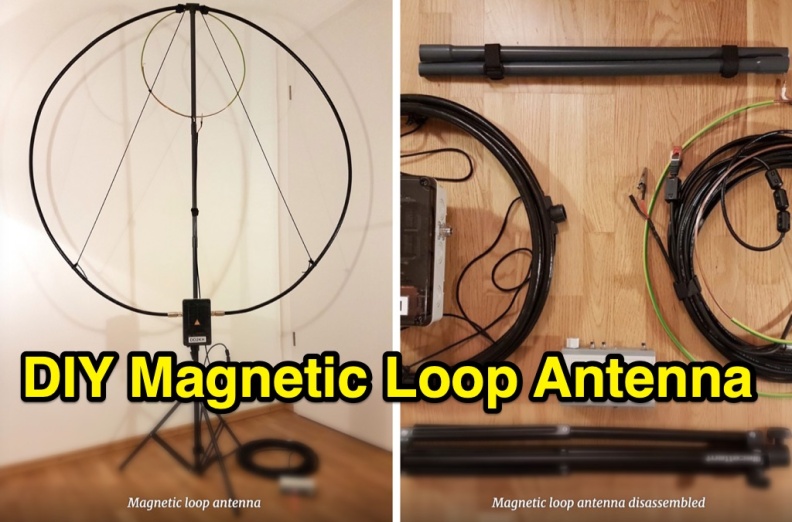 This tutorial provides detailed instructions for constructing a DIY magnetic loop antenna, ideal for amateur radio operators seeking efficient short wave communication. The design features a remote tuning system utilizing an Arduino and RC servo, making it suitable for indoor use where larger antennas cannot be installed. Magnetic loop antennas are compact and can operate effectively in confined spaces, but they do require careful handling due to the high voltages and currents they generate during operation. Users should possess the necessary technical skills to implement this project safely. The tutorial includes a comprehensive overview of the antenna's theory, specifications, and mechanical design. It outlines the components needed, including a Soviet-made variable capacitor and a digital RC servo for tuning. Safety precautions are emphasized, as the antenna can produce several kilovolts of voltage and high currents. The project is not certified for safety, and users are advised to proceed at their own risk. The tutorial also provides diagrams and explanations of the antenna's operation, making it a valuable resource for both beginners and experienced operators looking to enhance their setup.
 -
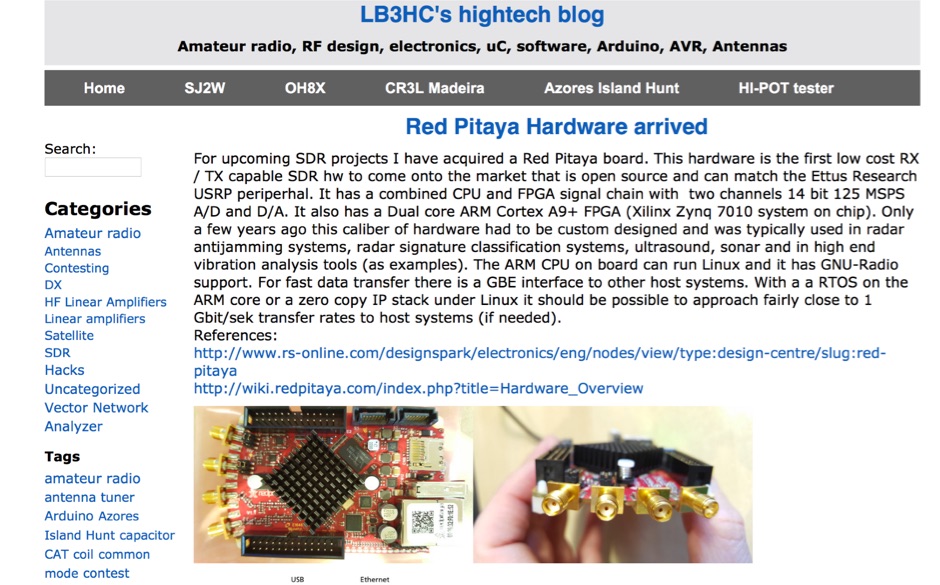 LB3HC's hightech blog - Amateur radio, RF design, electronics, uC, software, Arduino, AVR, Antennas
 -
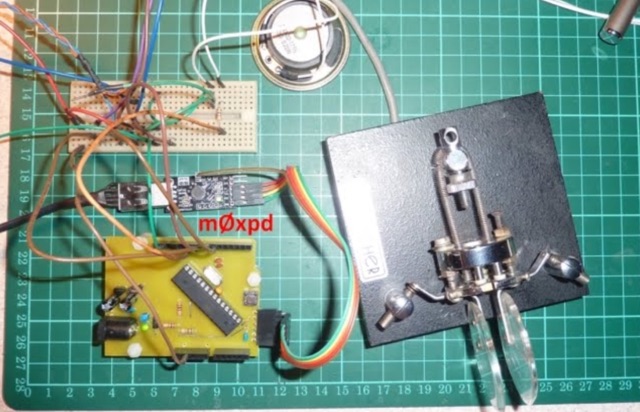
 This article introduces an Arduino-based QRP CW Transceiver designed for lower HF bands. The journey begins with the Wotduino, evolving from a keyer to a multi-mode beacon. The development includes a QRP transmitter and culminates in a receiver inspired by Roy Lewallen design. The transceiver, controlled through a control bus features a signal path, modulation, filtering, and adjustable frequency settings. Despite initial testing intentions, successful QSOs on 80 and 40 meters showcase its functional capabilities.
 -
 Web site and blog that reviews equipment, goes over safety, and display projects being built. Includes Yaesu FT-891 and Ameritron RCS-10 Review, a 555 Morse Code Practice Oscillator, and and arduino based Morse Code Practice Oscillator
 -
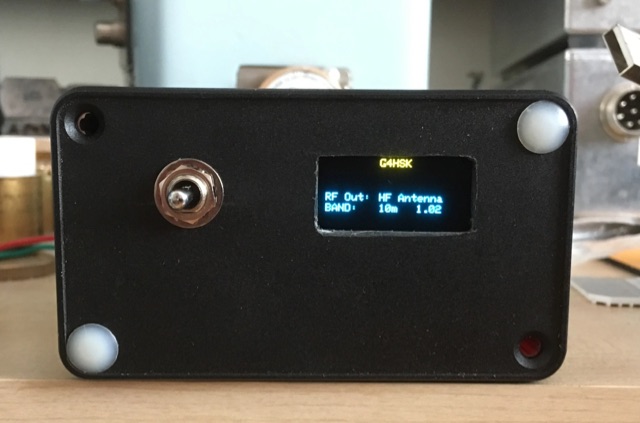 An Arduino Based Antenna Switch For The IC-7300 that monitors the band voltage from the rear accessory socket on the IC-7300. Two RF antenna relays are used to switch to the appropriate output.
 -
 This document details the construction, programming, and operation of a modular WSPR transmitter. The transmitter utilizes an ESP8266 NodeMCU, an SI5351 synthesizer with a TCXO for stability, and selectable low pass filters. Construction involves soldering headers, components, and assembling filter module. The ESP8266 is programmed via the Arduino IDE, requiring library installations and code modifications, including network credentials, callsign, and frequency . The transmitter is powered by USB or Vin terminals and its frequency is selected by jumpers and software settings. The document also covers FCC restrictions and how to use the WSPR network
 -
 This project is for those ham amateurs who do not have a commercial one . It's easy to build with a soldering iron, a plastic case and a little knowledge of arduino. The controller is made with budget components you can find easily in Internet. The main component is a cnc shield that fits over an Arduino Uno. Both made a compact, small and cheap controller.
 -
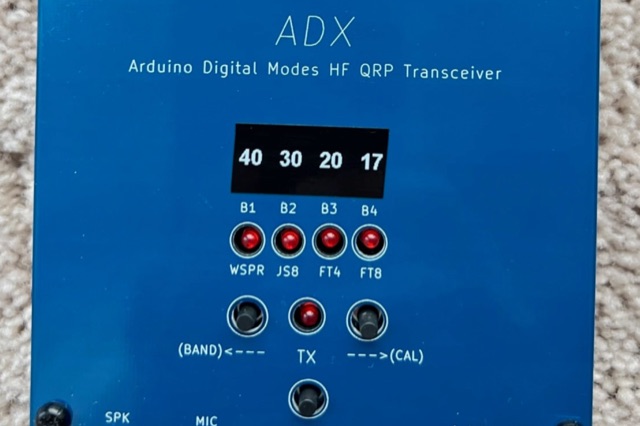 Arduino Digital Transceiver (ADX) is a low-cost HF transceiver for digital modes. This Arduino-based project, inspired by QDX, features four bands, including 80m and 20m, supporting FT8, FT4, JS8call, and WSPR. Designed for simplicity and affordability, it uses an Arduino Nano, SI5351 module, and CD2003GP receiver. The ADX project emphasizes easy procurement, construction, setup, and operation, making it an accessible option for QRP enthusiasts. The firmware update enhances functionality, including CAT control support.
 -
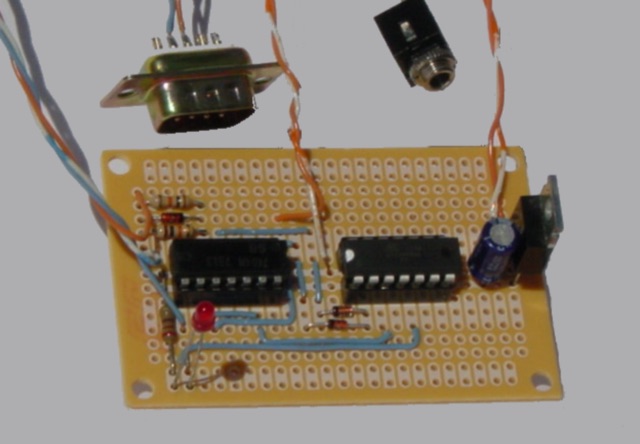
 A simple DIY project for a remote cw key connected to your Flex Rig (actually it can be any other rig). On the remote side it uses and Arduino Uno board and a cheap HanRun Enc28J60 ethernet shield. On the local side it uses a key (better a keyer) connected to a serial port of your pc
 -
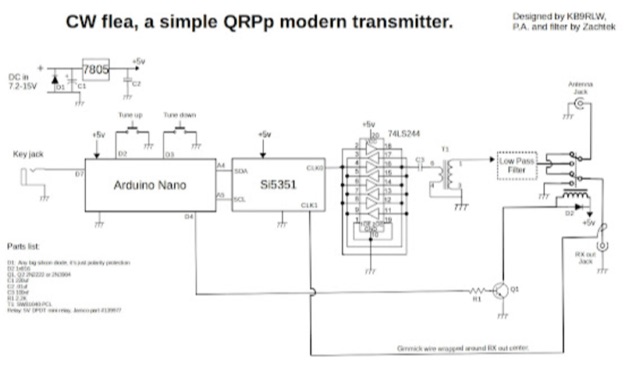 Reviving the spirit of early ham radio experimentation, the CW Flea is a contemporary Morse code transmitter. Utilizing an Arduino Nano, Si5351 clock generator, and innovative design, this open-source project offers simplicity, flexibility, and easy tuning for aspiring radio enthusiasts.
 -
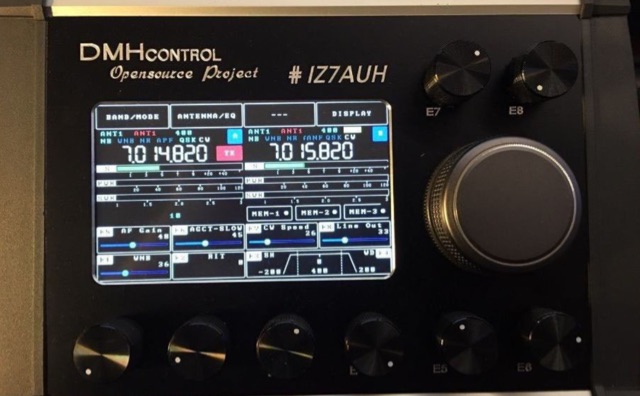 Arduino Flex Controller can be used with the new Flex 6000 Signature rigs. It is a DIY project and in these pages you will find all the informations you need to build and program your own. It is a perfect companion when used next to the official SmartSDR program but it can be used in stand-alone mode, without a PC.
 -
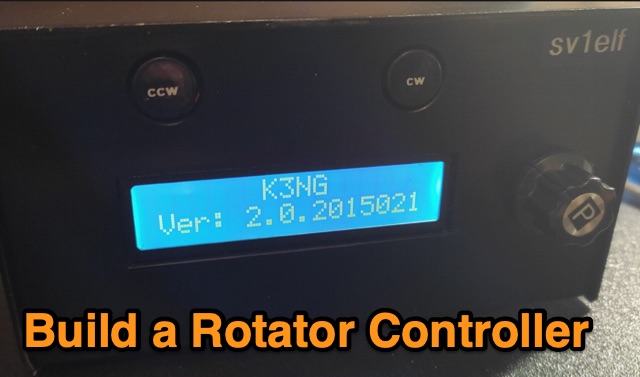 Controlling a rotator via computer can be costly, but a budget-friendly solution exists using an Arduino Nano and free software by Anthony K3NG. This setup allows for easy and enhanced rotator control, including screen and network management. Though initial software setup can be complex, pre-configured versions are available. Building and customizing the hardware interface is required, with comprehensive support provided by K3NG's resources.
 -
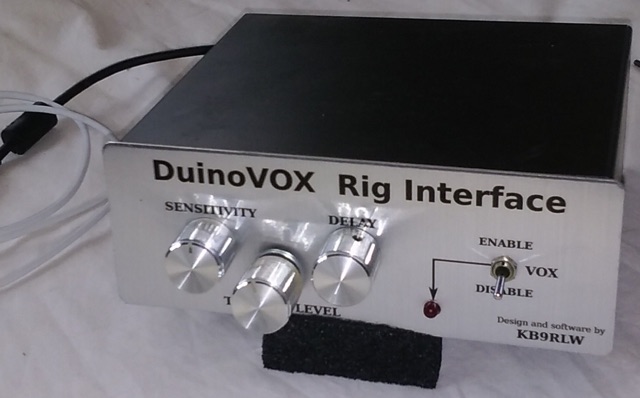 Cheap and easy to build digital modes USB interface for Ham Radio. The DuinoVOX Arduino powered digital modes USB interface for ham radio.
 -
 The author recounts their journey in ham radio, including the initial experience with Morse code. Now retired, he has rekindled his interest in ham radio and CW. Here share his project of constructing an Iambic Keyer with Arduino. The project includes a memory keyer and speed adjustment. Additionally, the author provides resources for an Arduino enclosure available on Thingiverse, enhancing the project aesthetics and functionality.
 -
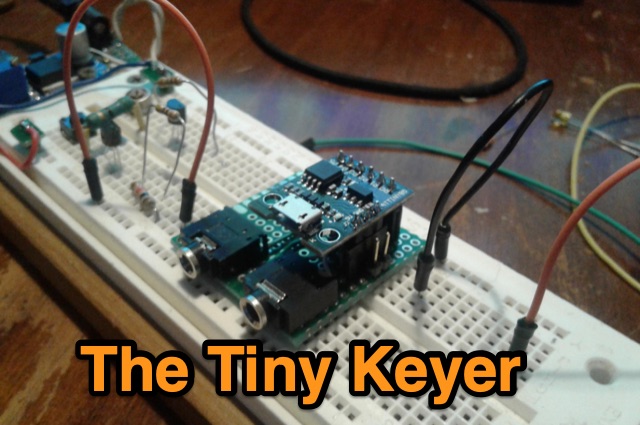 In his journey to improve Morse code skills, the author developed a straightforward device named the Tiny Keyer using Arduino. Tailored for Morse code enthusiasts and ham radio operators, this project utilized the budget-friendly Arduino ATTiny 85 Kickstarter board. With straightforward setup procedures in the Arduino IDE, the Tiny Keyer's small size and low cost make it accessible for beginners and hobbyist clubs interested in Morse code exploration.
 -
 Arduino/ATtiny Based (Ham Radio) ICOM CIV to Yaesu BCD Band Decoder. Build a ICOM CIV to Yaesu BCD Band to automatically band switch the Yaesu Quadra Amplifier.
 -
 This keyer being intended to be used mainly in conjunction with contest software. This keyer is based on an Arduino Nano and the Keyer software by K3NG. It has been designed with very basic features, and it is intended to work with logging software.
 -
 This blog post documents the author's journey building an APRS micromodem for amateur radio applications. Using an open-source design by LY2EN, the author assembled a cost-effective Terminal Node Controller (TNC) with SMD components, an Arduino Nano, and a JDY-31 Bluetooth module. The construction process included PCB fabrication, careful component soldering, microcontroller programming, and Bluetooth configuration. A custom 3D-printed case protected the completed device. Field testing in Romania showed the device functioned with a Baofeng UV-5R radio, though antenna limitations affected performance. The entire project demonstrates an affordable DIY alternative to commercial APRS trackers.
 -
 This Arduino project explores long-range RF communication using EBYTE E32 1W LoRa modules (either E32-915T30D or E32-900T30D) paired with ESP32 microcontrollers featuring OLED displays. The setup leverages the modules' Semtech SX1276 chip with amplifier to achieve up to 1W transmission power—significantly more than the chip alone provides. Unlike other LoRa implementations, these modules include a microcontroller that simplifies interface through UART rather than SPI. The documented implementation includes proper wiring between components and Arduino code that configures the module, displays received messages on the OLED screen, and transmits messages every two seconds while keeping power consumption manageable.
 -
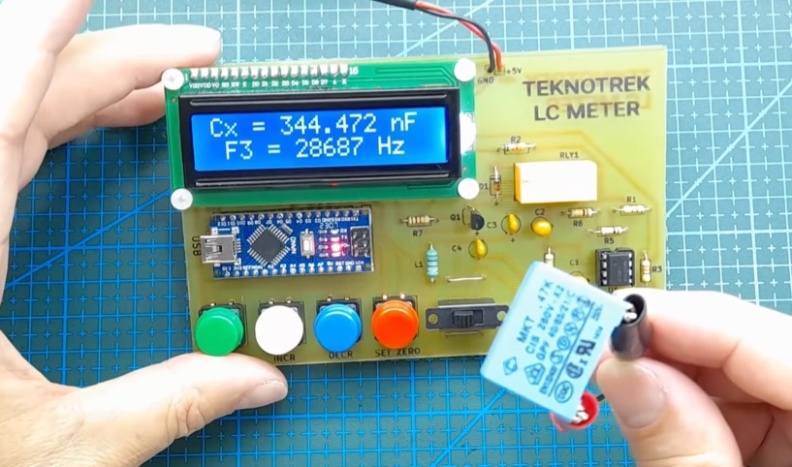 An **Arduino LC Meter** provides an accessible solution for precisely measuring inductance and capacitance values, crucial for RF circuit design, filter tuning, and troubleshooting in amateur radio applications. This project details the construction of a low-cost, accurate instrument using readily available components, making it an attractive alternative to commercial units for hams and electronics enthusiasts. The build process involves assembling a resonant circuit, integrating an Arduino microcontroller for frequency measurement, and displaying results on an LCD. Key components include an Arduino Uno, a 16x2 LCD, a 74HC14 Schmitt trigger inverter, and a few passive components. The design leverages the Arduino's processing power to calculate L and C values from resonant frequency shifts. Calibration procedures are outlined to ensure measurement accuracy, which is vital for critical RF work. The project includes schematics, a parts list, and the necessary Arduino code, enabling hams to construct a functional LC meter for their workbench.
 -
 This page provides a detailed guide on how to receive WWVB 60 KHz time signals using the Everset ES100 module with an Arduino Due microcontroller. It explains the background of time standards and the significance of WWV radio stations in maintaining these standards. The content is useful for ham radio operators interested in time synchronization, scientific research, navigation, and radio communications. The article is written by Keith Greiner, who shares his project inspired by his passion for the subject. For more projects by the author, visit the provided links.
 -
 A UHF Frequency Counter up to 1 GHz, includes the Block Diagram , test sketch for Arduino/Genuino Nano
 -
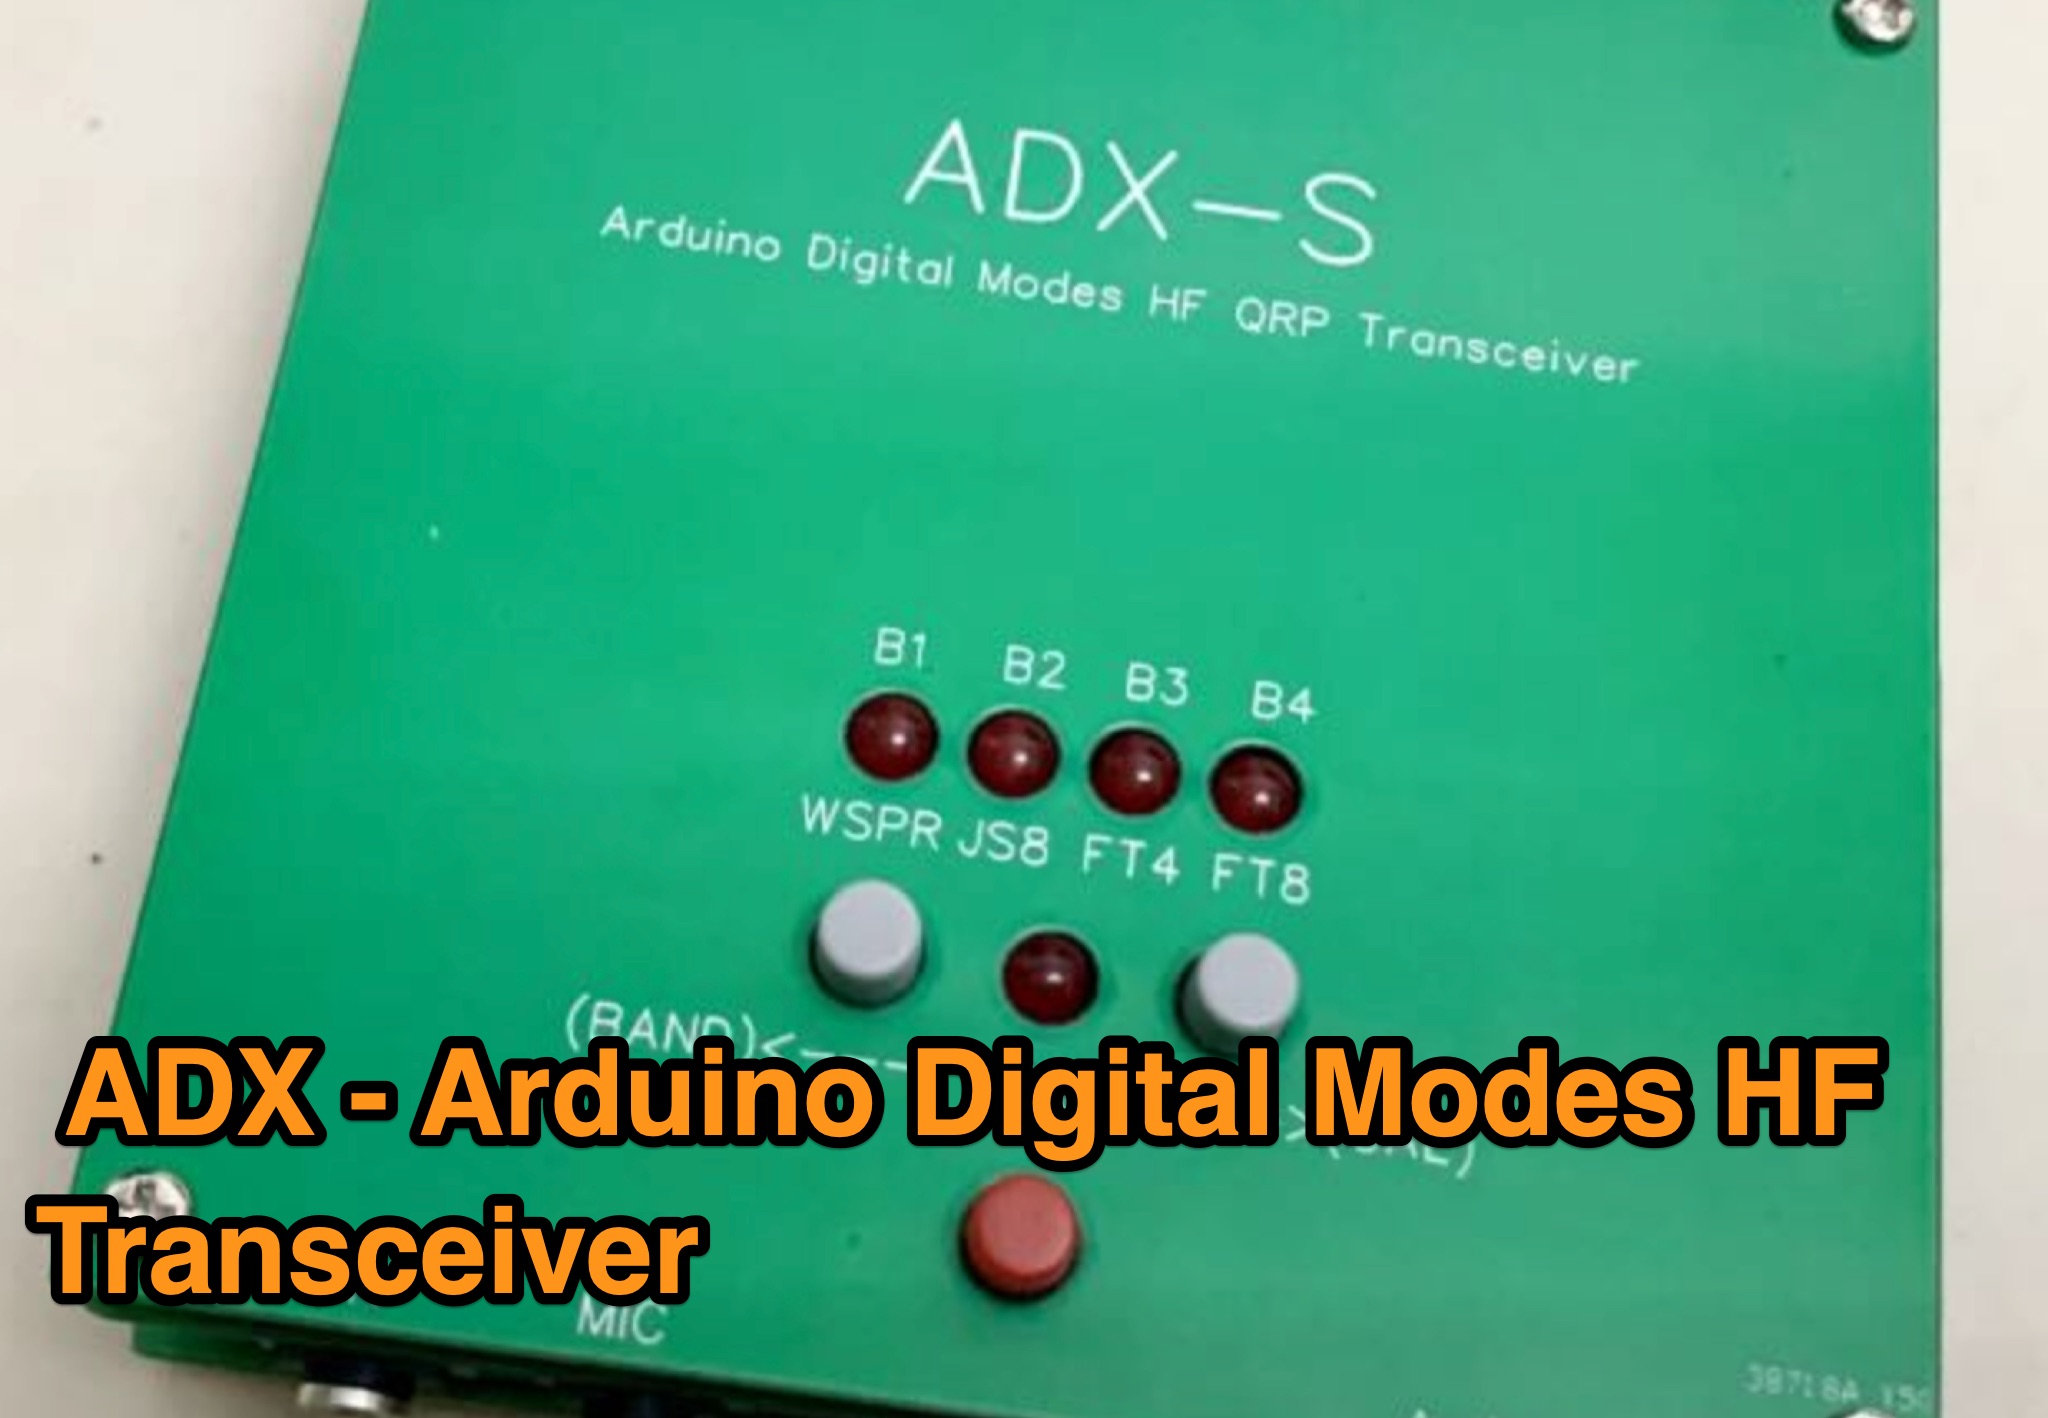 This page provides updates, manuals, and firmware for the ADX - Arduino Digital Modes HF Transceiver. Learn about calibration procedures, band display bug corrections, and important notes on the SI5351 library. The content includes a detailed build manual and firmware updates for the ADX, a mono band (actually quad band) digital modes optimized HF transceiver based on Arduino. Stay informed about the latest releases, bug fixes, and enhancements to improve your experience with the ADX transceiver.
 -

-
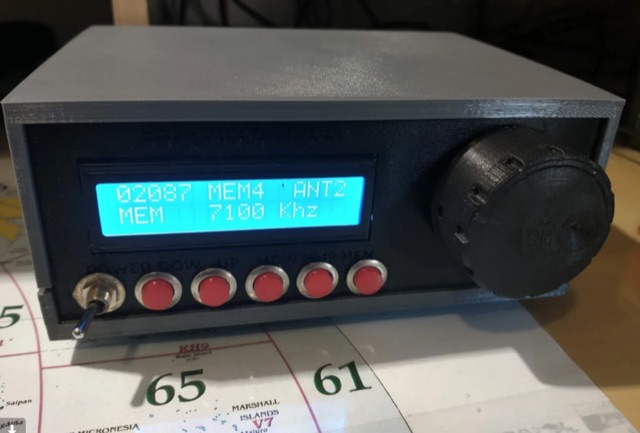
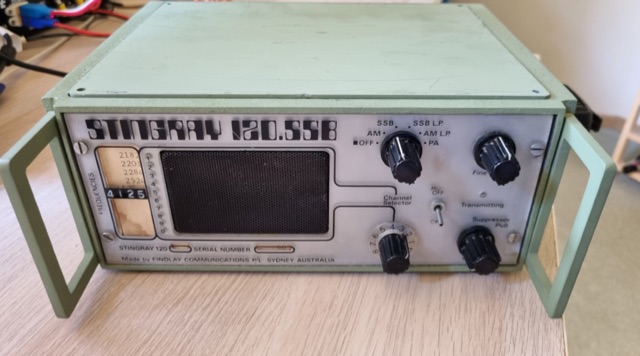 Recently, at the Ballarat Hamfest, the author acquired an old Marine transceiver for just $10, charmed by its sturdy construction and waterproofing. Made by Findlay Communications in Sydney, this crystal-controlled transceiver had been dormant but was reinvigorated with minor fixes. A manual was sourced, and further repairs were made, including an ingenious crystal oscillator replacement using an Si5351a controlled by an Arduino. The refurbished radio, complete with a fresh coat of paint and added customizations, is now operational for 160m AM and 30m SSB. A successful and cost-effective restoration.
 -
 This page presents the Arduino radio receiver project created by EasyEDA in 2024. It includes design drawings, BOM, and project details. The content is aimed at hams interested in building their own radio receiver using Arduino technology. The project is shared under a CC BY-ND 4.0 license, allowing others to replicate and modify it. The page also includes comments from project members, making it a useful resource for hams looking to explore radio receiver construction.
 -
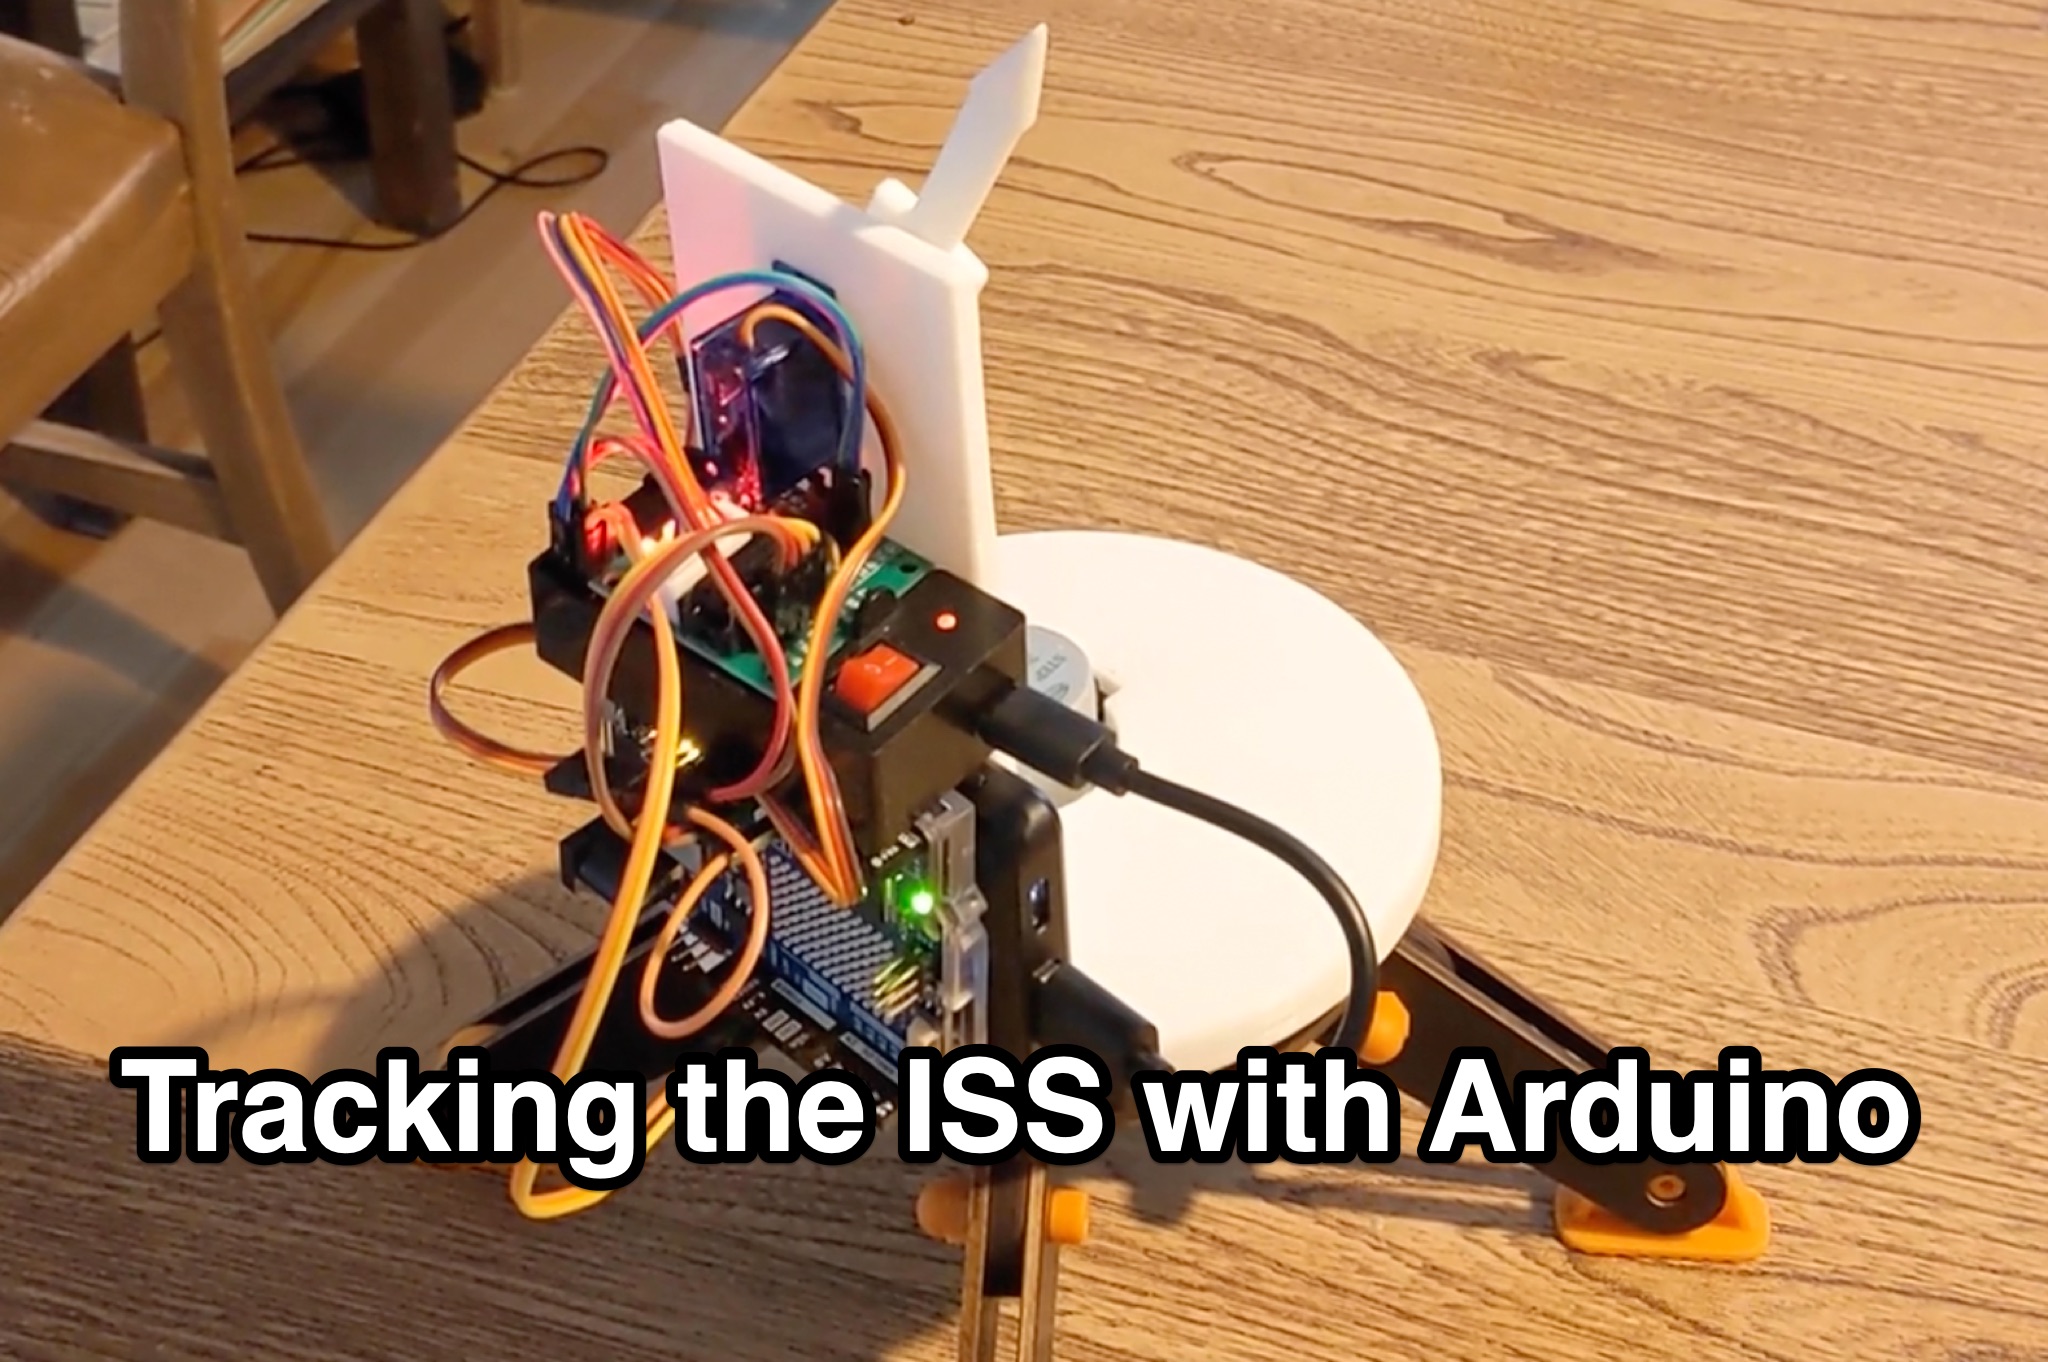 Learn how to hack an IR turret to track the International Space Station (ISS) as it passes overhead. Discover the basics of the ISS and how to use simple tools to point an arrow at the ISS without looking at a phone. Find out how to calculate the azimuth and elevation angles to locate the ISS in the sky and enjoy watching this habitable space craft orbit the earth at a speed of 28,000 km/h. Take your hobby to the next level by bouncing radio signals off the ISS or even talking to the astronauts on board. Turn stargazing into an interactive and educational experience with this fun and practical project.
 -
 A low-cost Arduino project expanding on the button tutorial, where three inputs act as "buttons" generating Morse code on a WOTDUINO. This keyer, costing around £4, offers learning potential and hints at more complex ham radio applications.
 -
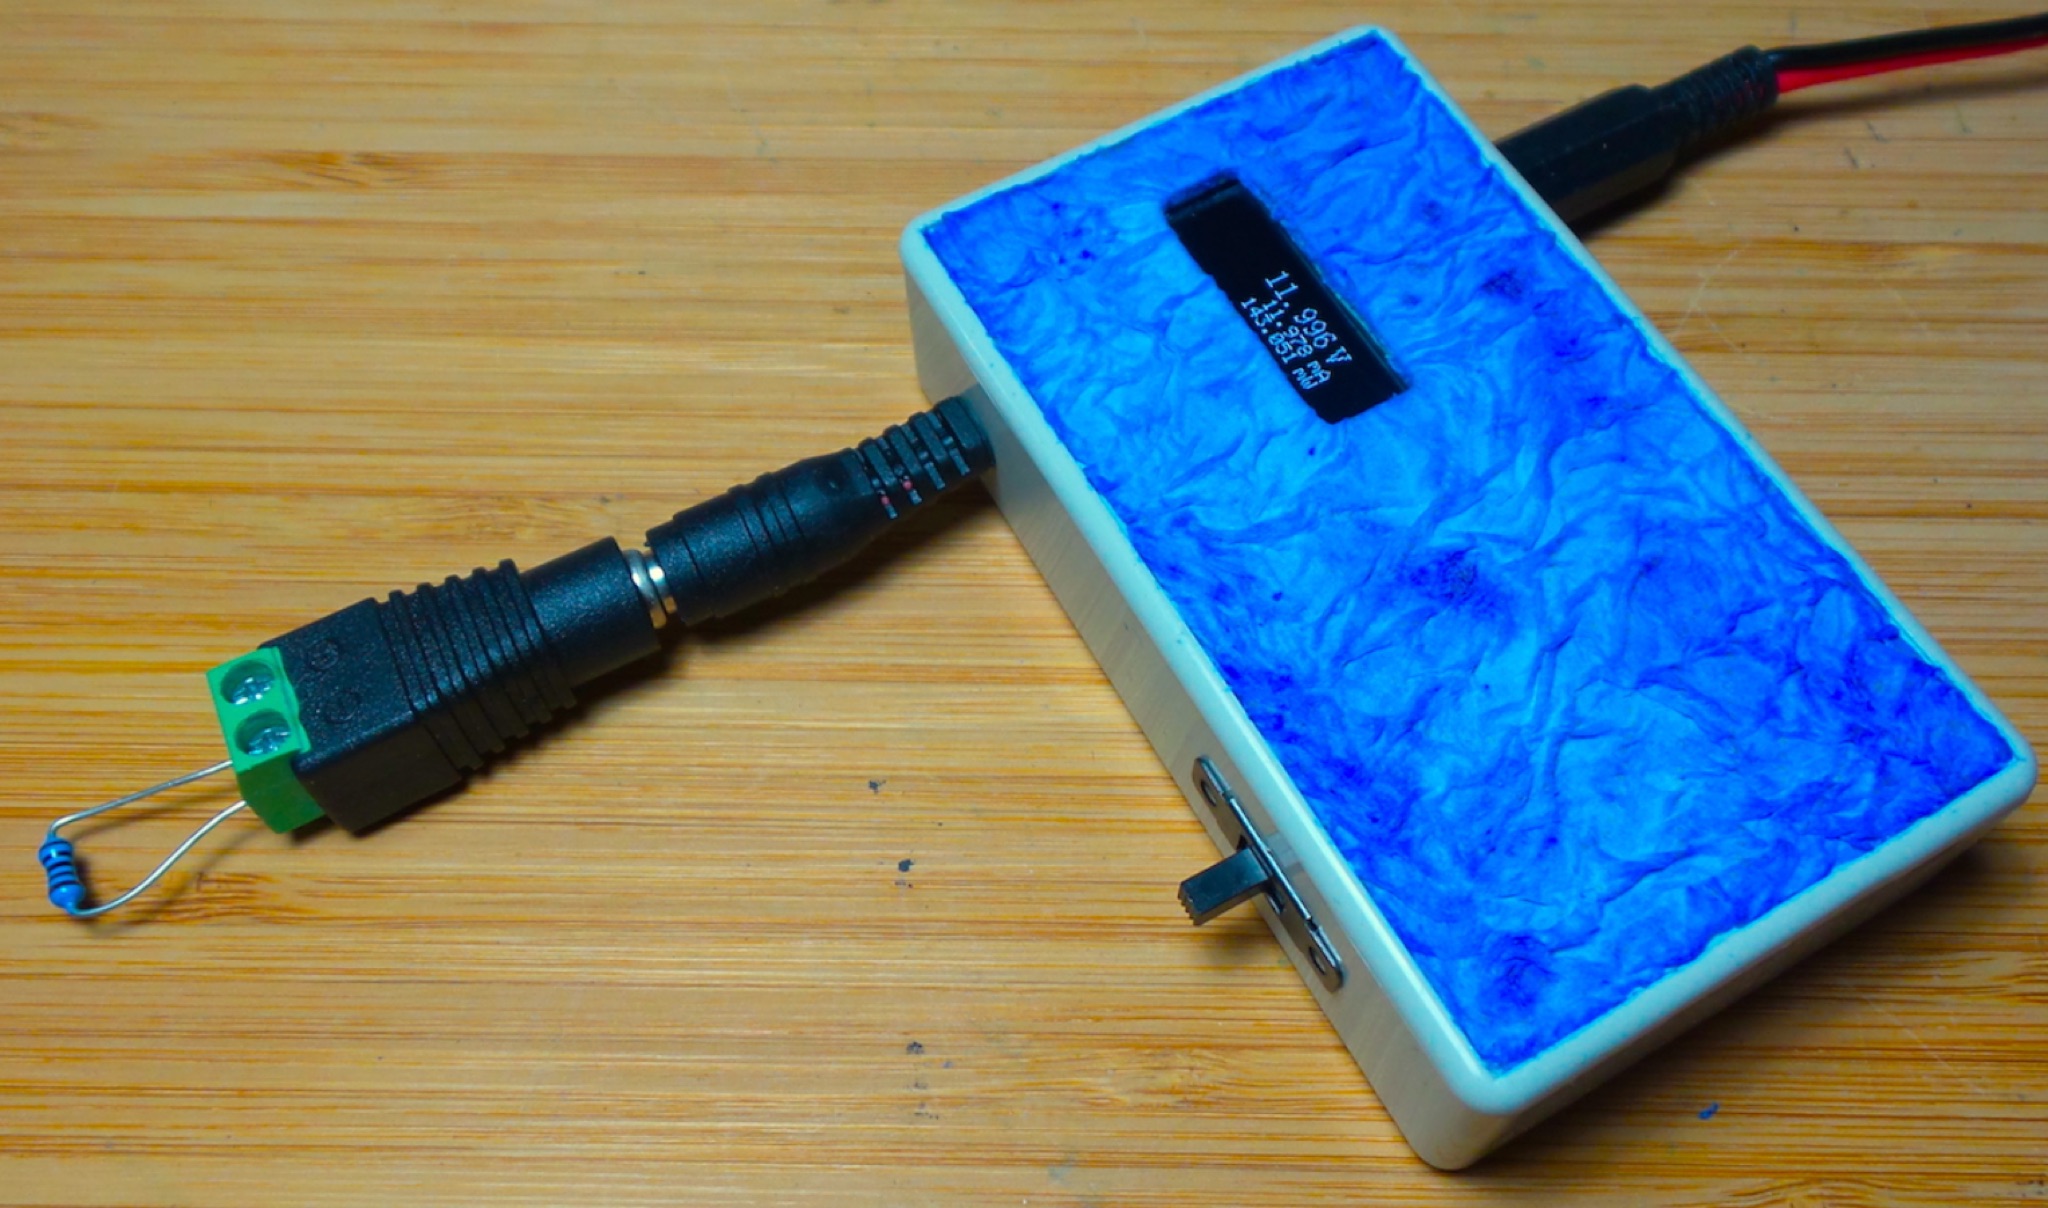 The DIY Power Meter project utilizes the _INA226_ high-side power monitoring chip, paired with an ATtiny85 microcontroller, to measure voltage, current, and power, displaying the results on a 128x32 OLED screen. The INA226 communicates via an I2C interface and is programmed with a calibration factor based on the shunt resistance and current register LSB. The project is designed to handle a maximum current of 500mA using a 0.16ohm shunt resistor, which can be adjusted to a 0.2ohm resistor, reducing the full-scale current range to 409mA with a resolution of **12.5uA**. The shunt resistor dissipates only 33mW at maximum current, making 1/4 watt resistors suitable for the setup. The PowerMeter.ino sketch configures the shunt resistance and maximum design current, automatically calculating the calibration factor. The project can be prototyped on a breadboard using an Arduino Uno, employing the Wire library for INA226 and OLED communication, and the u8g2lib library for the OLED display. For the ATtiny85 version, the Adafruit-TinyWireM and Tiny4kOLED libraries are used. The power meter is independently powered by a 3V CR2032 cell, with power switching options including manual switches or DC switched jacks. The low-side n-channel MOSFET switch configuration is tested but introduces voltage drop issues, making manual switching a more reliable option until a suitable DC switched jack is found. DXZone Technical Profile: INA226 | ATtiny85 | OLED Display | Power Meter
 -
 This blog post from KA7OEI covers the author's initial exploration into the world of Arduino, a popular open-source electronics platform. The post likely discusses the author's experiences, challenges, and successes with Arduino projects, particularly in relation to amateur radio or other technical hobbies. It may provide insights, tips, or inspiration for hams interested in incorporating Arduino into their own projects. The content is likely informative, personal, and geared towards amateur radio operators or electronics enthusiasts.
 -
 M2 CW decoder Kit, is an Arduino based morse code decoder, kit produced and delivered by WB7FHC
 -
 The CW keyer with memories, inspired by SOTA activities, features three on-the-fly programmable memories for hands-free operation during logging or specific calls. Designed for low power consumption, it uses AAA batteries and an Arduino Mini, optimized for minimal energy use with a sleep function. The compact design fits in a small TEKO box, with a printed circuit board for easy assembly. The keyer includes customizable software for various CW modes and settings, programmable via paddles and command mode. It's an efficient, portable solution for amateur radio enthusiasts seeking enhanced CW functionality.
 -
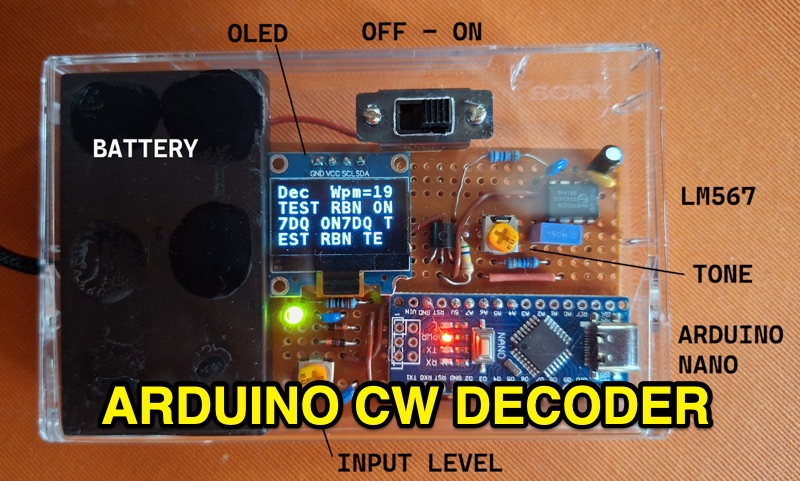 The project details the construction of a small, portable **CW decoder** built around an Arduino Nano and an LM567 tone decoder circuit. It integrates an OLED display for output and is powered by a 1200 mAh Li-Po battery. The Arduino Nano is programmed with a modified version of the OST Morse Box firmware, originally based on Budd, WB7FHC's work, provided as a HEX file for flashing. The LM567 output connects to Arduino pin D2, while pins A6 and A7 are grounded due to the absence of potentiometers, simplifying the circuit. Standard I2C connections are used for the OLED: SDA to A4 and SCL to A5. The entire assembly, including the Arduino, OLED, and decoder circuit, is mounted on a perfboard to fit precisely within an old cassette tape box. This design emphasizes portability and compact form factor. Parameters for the decoder can be adjusted using a dedicated Windows Control program, offering flexibility in operation. The resource provides practical insights into adapting existing firmware for specific hardware constraints and achieving a self-contained, battery-powered **Morse code** decoding solution.
 -
 This article describes the implementation and testing of a low-power GPS tracker using LoRa technology in the 433MHz amateur band. The system, built with AIThinker RA-02 modules and Arduino controllers, demonstrated successful communication over non-line-of-sight distances up to 5km. Operating with a 125kHz bandwidth and spreading factor of 11, the tracker achieves a data rate of 500 bits/sec. Powered by a LiPo cell with power-saving features, the final compact design operates for approximately 1.5 weeks between charges with 3-minute reporting intervals, consuming just over 1mA in idle mode.
 -
 This is a basic Arduino project for decoding Morse code. This is an Arduino program that decodes Morse code from an I/O pin and display in to an LCD screen
 -
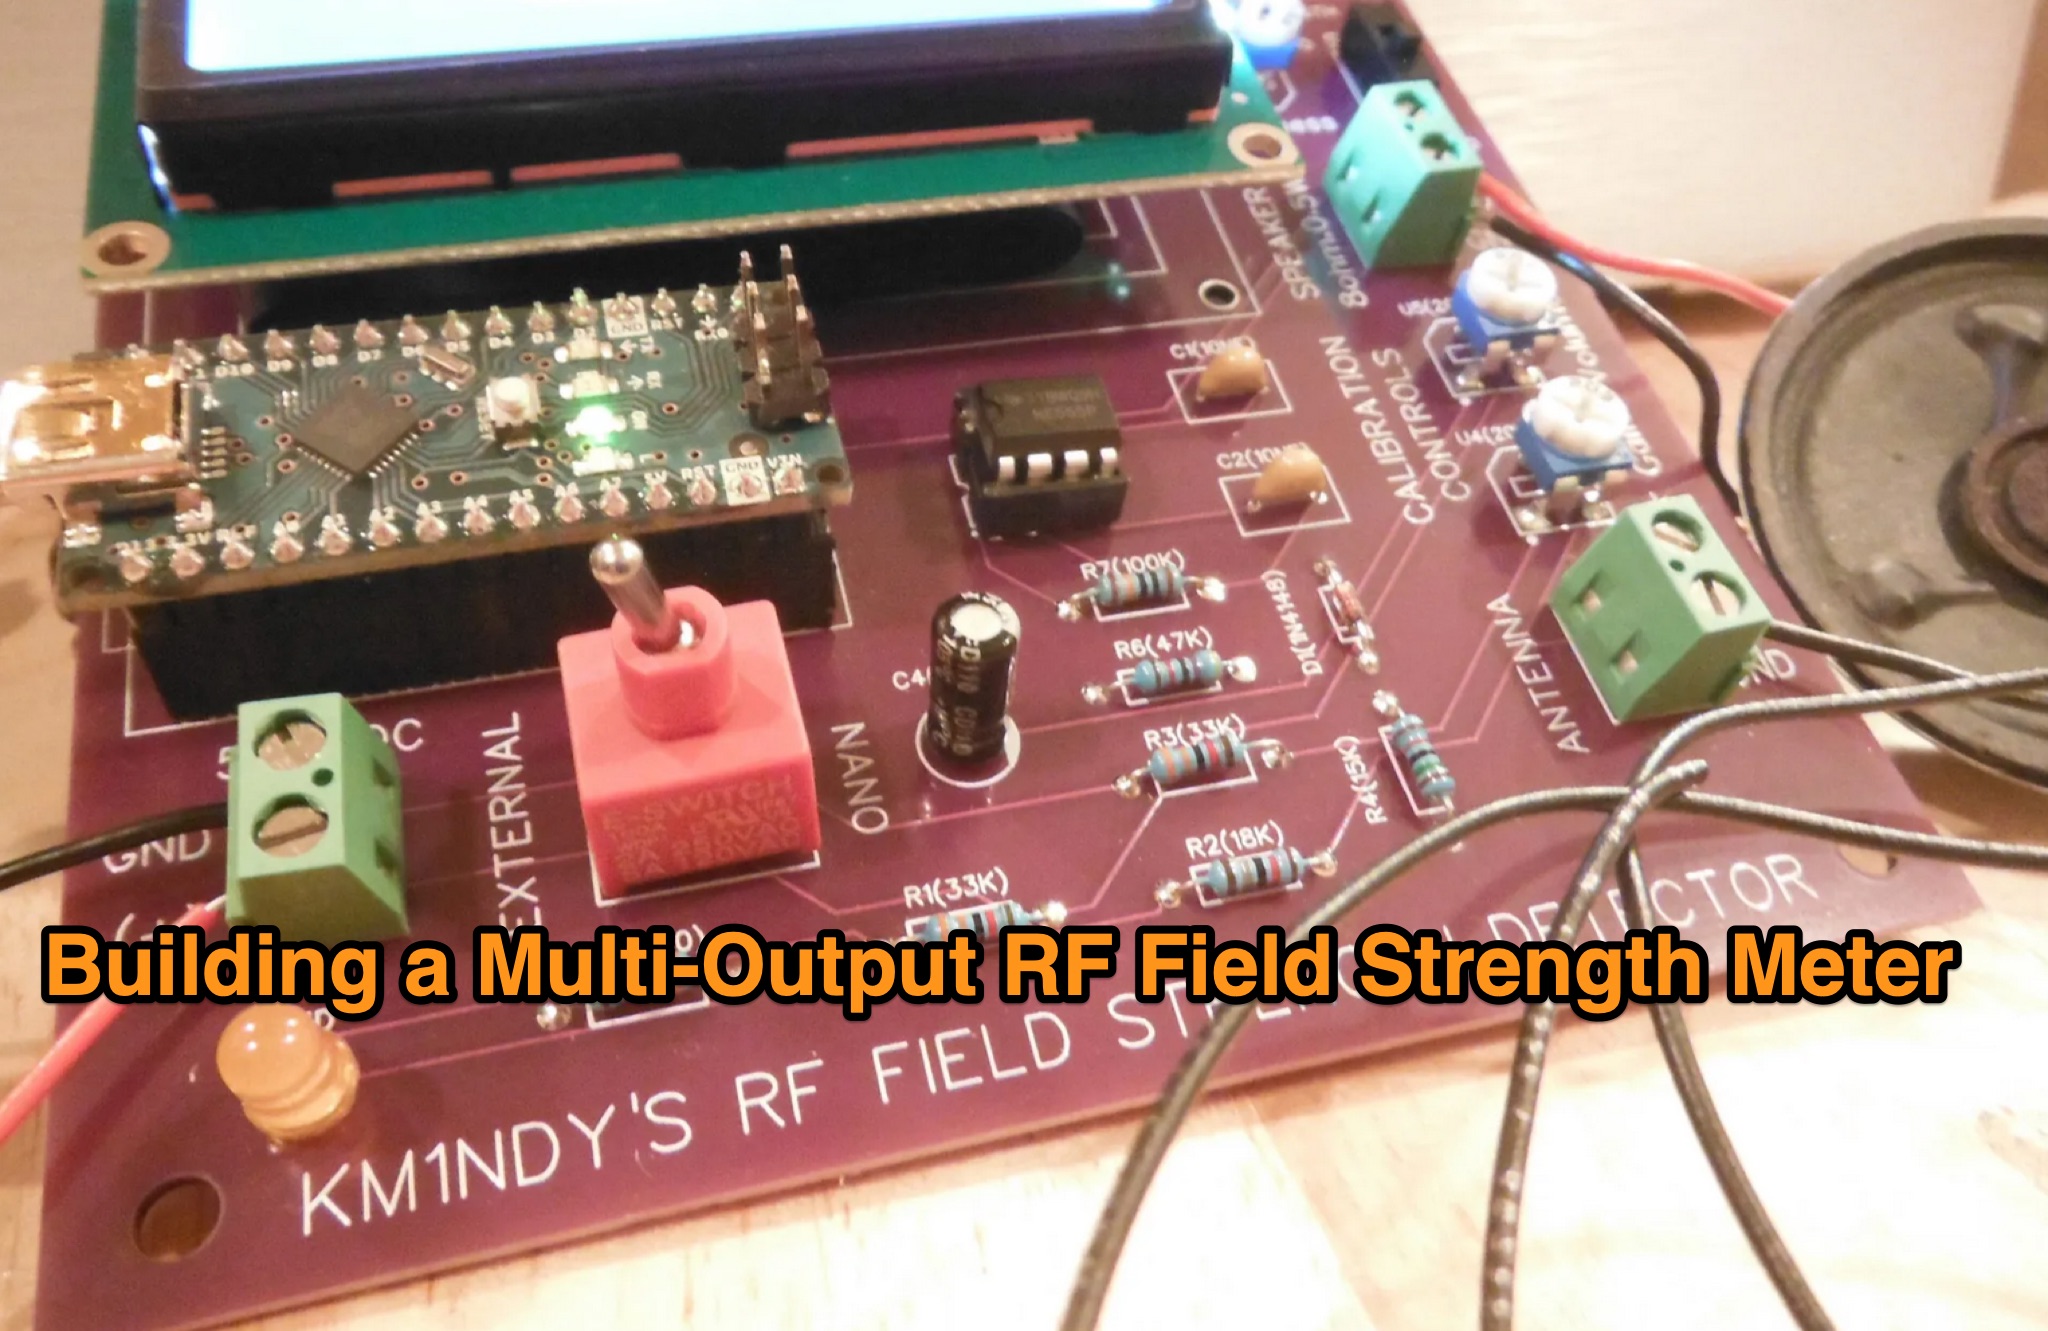 This article describes a DIY RF field strength meter project inspired by VK3YE's "The Squeakie" design. The device, built around a 555 timer IC and a 1N4148 diode, converts RF signal strength into audible tones with proportional pitch. The author enhanced the original design by adding volume control, LED indication, and digital readout capabilities using an Arduino Nano and LCD display. The completed project functions as a versatile RF detection tool, suitable for antenna testing and fox hunting, while offering multiple output methods: audio, visual, and digital measurement display.
 -
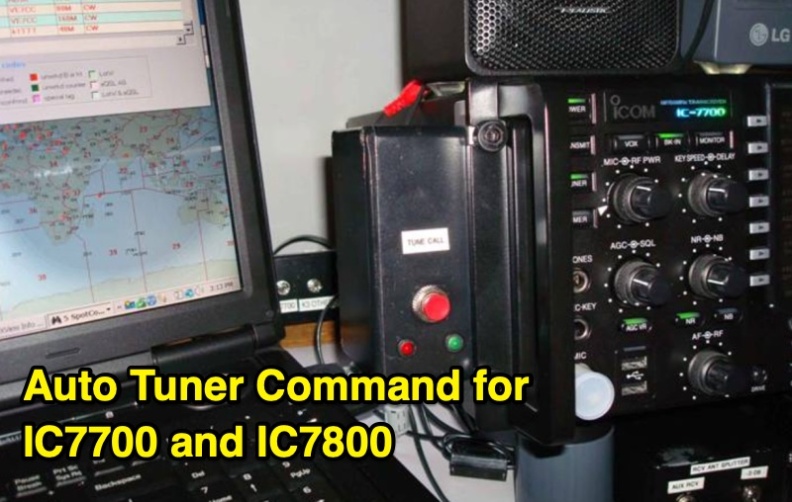 An Arduino-based interface provides a remote tuner call command for Icom **IC7700** and **IC7800** transceivers, addressing the lack of a built-in function for external tuners such as the MFJ 998RT. This setup initiates a low-power transmit signal, typically 15 watts, allowing the remote autotuner to perform its matching sequence. The article details the required CI-V line communication and modifications to existing Arduino code, specifically referencing contributions from Jean-Jacques ON7EQ for improved Icom interrogation routines. The system involves a sequence of steps: storing the transceiver's current mode and power, disabling the internal autotuner, activating a control relay to interrupt the amplifier line, switching to RTTY mode at low power, and initiating transmit. The transmit duration is manually controlled by the operator, observing the SWR meter until a low SWR is achieved, then a second button press stops the transmission. A built-in 4-second transmit limit provides a safety measure. After tuning, the routine restores the original mode and power settings, re-enables the internal autotuner, and performs a brief 2-second RTTY transmission for internal tuner adjustment. The circuit diagram includes a Panasonic form 2 relay for amp control and emphasizes critical delays in the Arduino code for stable operation at 9600 baud CI-V communication. Compatibility with logging software like DXLab, N1MM, and N3FJP is noted, with specific interrogation time settings required to avoid conflicts.
 -
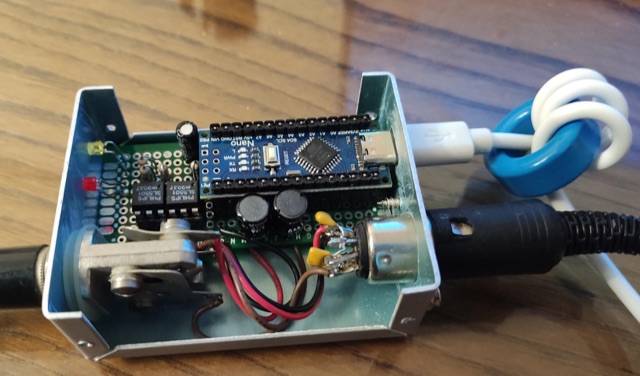
 Demonstrates an **Arduino-based** solution for the Icom IC-7300 transceiver, specifically addressing the operational inconvenience of switching between a CW paddle and a straight key. The project leverages the IC-7300's **CI-V bus** (Computer Interface 5) to provide instant keyer type selection and two preset power levels, bypassing the rig's menu system which otherwise requires eight button presses. This implementation utilizes the 3.5mm CI-V connector, leaving the USB port free for CAT control and the internal soundcard, a critical design choice for integrated station setups. The system's utility is particularly evident for CW operators who frequently alternate between keying methods during contesting or general operating. The article details the hardware setup, including an Arduino Nano, a 3.5mm jack for CI-V, and pushbuttons for control. An update in 2023 expanded the project to incorporate an 8-button Nintendo controller, enhancing user interface flexibility and demonstrating the adaptability of the initial design for further customization and feature integration.